 This post is a simple walkthrough for getting the latest Flare3D pre release (2.0.42) and the latest FlashDevelop (4.0.0 RC1) working together nicely. This post builds on an older how-to done by the Flare3D team which can be found here.
Get the latest FlashDevelop
- Download FlashDevelop 4.0.0 RC1 here.
- Run the installer.
- Make sure that you install Flex 4.5 SDK as part of the FlashDevelop installation. The installer will do this by default.
Get FlashPlayer 11
- Download the latest FlashPlayer here.
- Note that Chrome updates its FlashPlayer automatically, and at the time of this posting, it was still at version 10.3. You may have to use a different browser, such as Firefox. See Nick H’s comment below on how to use FlashPlayer 11 in Chrome by disabling the default player plug-in.
Get Flare3D 2.0 Pre-Release
- Sign up here to get a download link emailed to you.
- Unzip the downloaded files.
Configure the Project
- Open flare3d_prerelease.as3proj in FlashDevelop
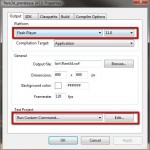
- Open the project properties (right click on the project and select “Properties"li>
- In the Output tab, Platform group box, select Flash Player version 11.0
To automatically launch in Firefox:
In the Test Project group box (still Output tab) select ‘Run Custom Command…’, click Edit, and enter ‘firefox.exe bin\index.html’
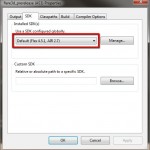
Go to the SDK tab and make sure that Flex 4.5.1, AIR 2.7 is the selected SDK
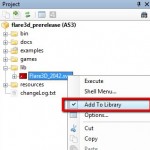
- Go to the Compiler Options and add ‘lib\Flare3D_2042.swc’ to the SWC Libraries array. Right click on ‘lib\Flare3D_2042.swc’ in the project tree and check ‘Add to Library’. Thanks to Philippe for this suggested change.
Run an example
- Open the ‘examples’ folder in the project
- Right click on Test01_The_Basics1.as
- Click Document Class
- Build & Launch by pressing Ctrl+Enter
