One of the first things you should do when setting up your home network is decide on a naming scheme. Have fun with this part. You will need to pick a workgroup name as well as names for each of your computers/devices.
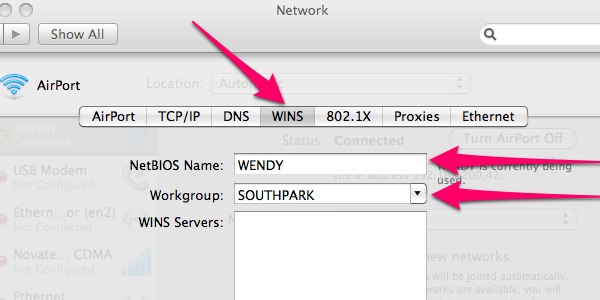
I like the TV show South Park, so I decided to base my network device names on South Park characters. My workgroup name is SOUTHPARK, my main desktop is named STAN, my wife’s computer is named WENDY, and my server is named BUTTERS. You might want to base your naming scheme on Mario Kart characters, Transformers, Zelda Characters, Chevy cars, horse breeds, Game of Thrones houses, or something else you are interested in.
It’s important that you be consistent with the capitalization of your device names. I generally stick with all-caps names. You’ll also want to name your WiFi network. I named mine the same as my workgroup.
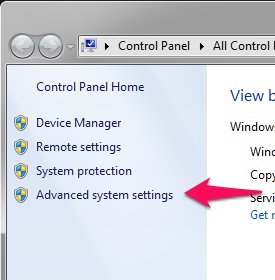
Windows 7 - Set Computer Name/Workgroup
Open the Start Menu, right click Computer, and click Properties
In the left column, select Advanced system settings
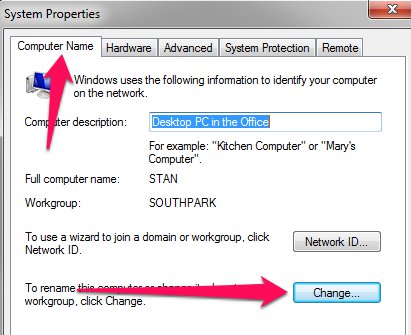
Select the Computer Name tab and click the Change… button.
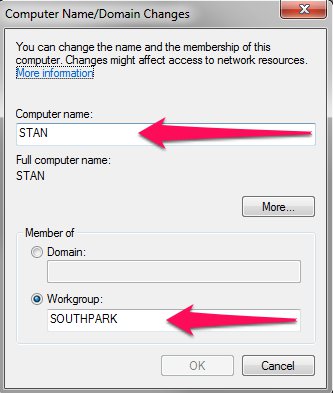
Insert your desired computer name and workgroup name
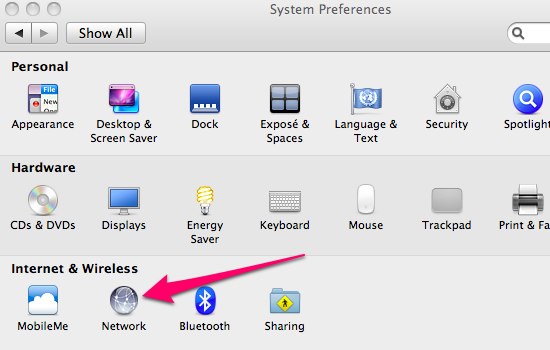
Mac - Set Computer Name/Workgroup
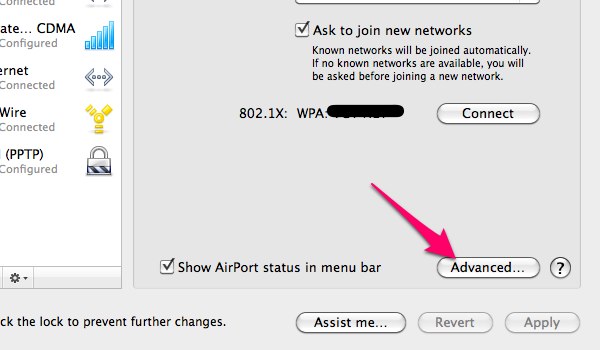
Open System Preferences | Network
Select the Advanced option
Select the WINS tab and enter your desired computer name and workgroup
Ubuntu - Set Computer Name/Workgroup
I don’t have a Ubuntu system up and running at the moment, so I’ll point you to an article over on Liberian Geek for instructions on this one: Windows 7 vs. Ubuntu 12.04: How to Change System Workgroup. The Ubuntu portion is about half-way down the page.
Android/iOS - Set Computer Name/Workgroup
This doesn’t seem to be possible with most Android/iOS devices without rooting or jail braking them. Sorry if I got your hopes up.